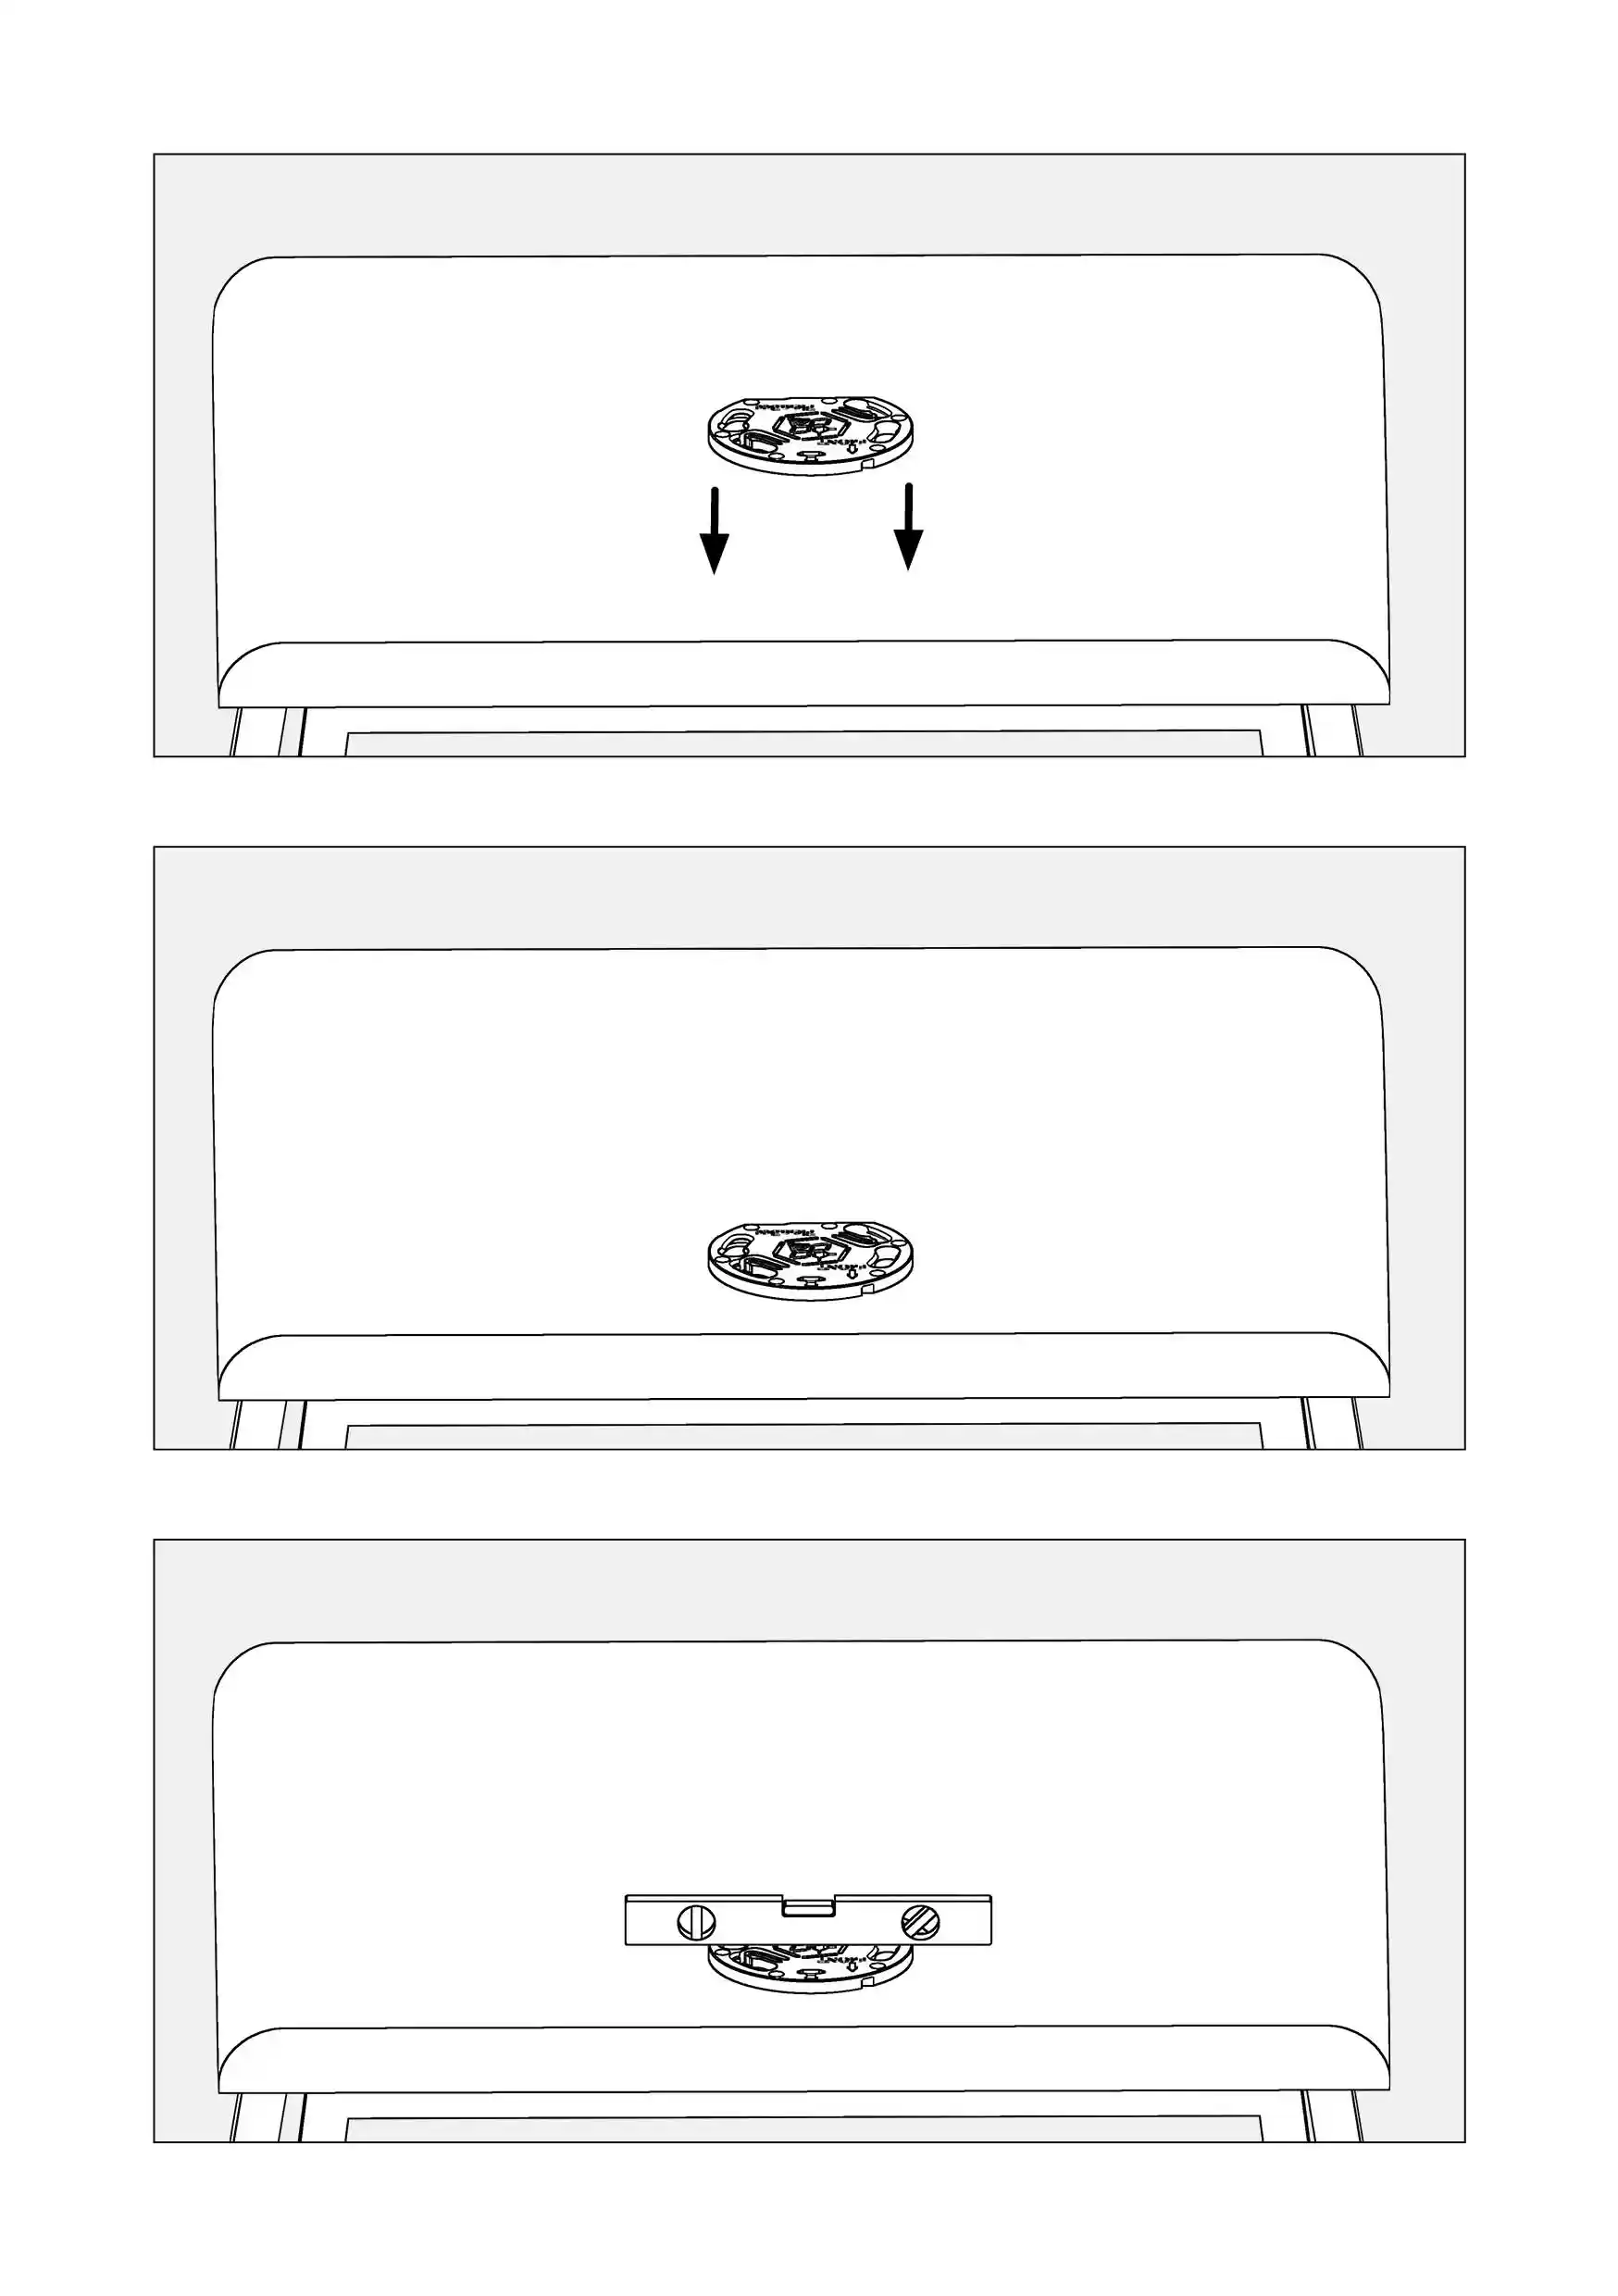
Montare la flangia di fissaggio sul tetto

Important!Importante!
It'sÈ crucialfondamentale tomantenere maintainuna adistanza minimumminima distance ofdi 80 cm betweentra theil centercentro of thedel controller ande theil centercentro ofdell'asse theposteriore rearquando axlelo whensi installinginstalla itsul on the roof.tetto.


---


ItÈ ismolto veryimportante importantche foril thecontroller Steeringdi Controllerguida tosia beposizionato placedal incentro thedel middletetto ofdel thetrattore tractorper roofgarantire tola ensureprecisione thedella accuracy of the navigation.navigazione.

---
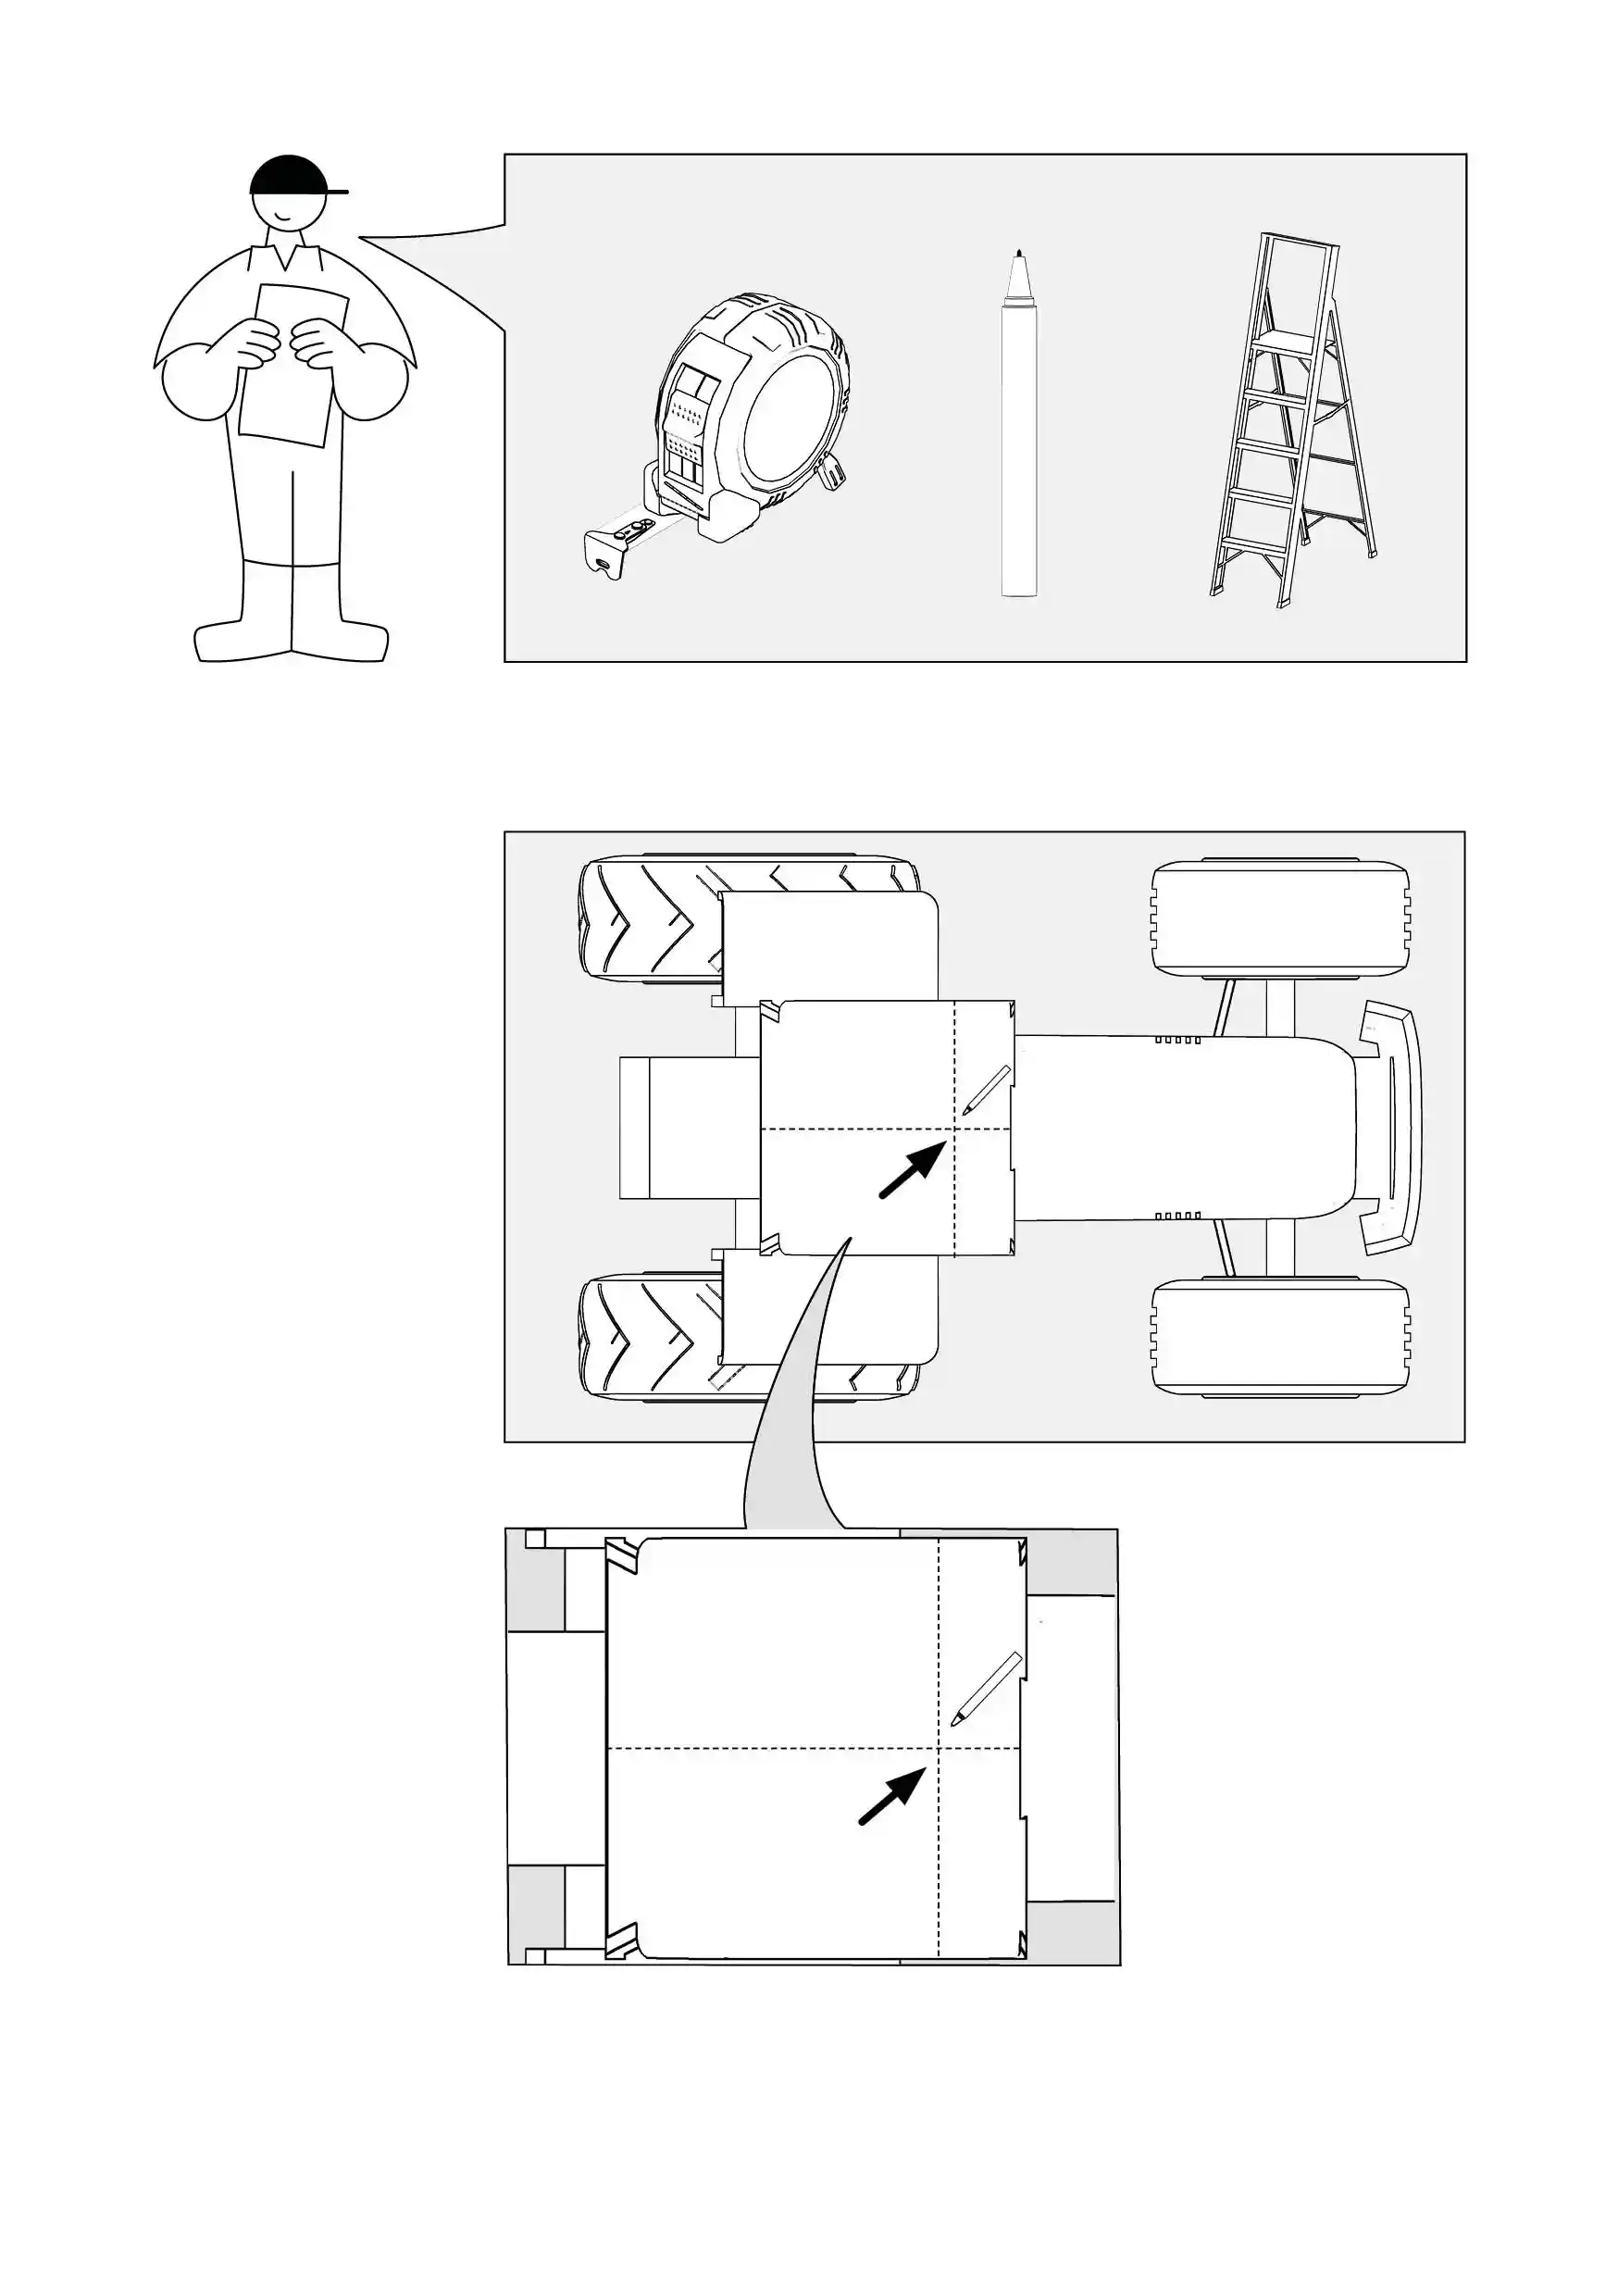
RequiredStrumenti tools
necessari
  • Tape-measureMetro di misura a nastro
  • Marker penPennarello
  • AUna ladderscala

HowCome to do it?fare?
  1. TakePrendete una scala e posizionatela accanto al trattore in modo da poter accedere facilmente al tetto.
  2. Controllare la lunghezza del tetto del trattore con un metro a ladder and position it next to the tractor
    so that you can easily access the roof.nastro.
  3. CheckCon theun lengthpennarello ofsegnare theun tractorpunto roofal usingcentro adella tapelunghezza measure.del tetto.
  4. UseControllare ala markerlarghezza pendel totetto markdel atrattore spotnel punto in thecui middleè ofstato thesegnato lengthun of the roof.punto.
  5. CheckCon theun widthpennarello ofsegnare theun tractorpunto roofal incentro adella placelarghezza wheredel you marked a spot.tetto.
  6. UseIn aquesto markermodo penè topossibile marktrovare ala spotposizione inpiù theadatta middleper of the width of the roof.
  7. This way, you can find the most suitable
    position for the Steeringil Controller.

YouSui candispositivi horizontallymobili scrollè thepossibile tablescorrere onorizzontalmente mobile.la tabella.


PowerSteer_manual_25.10_eng91.webp

Important!Importante! 
It'sÈ crucialfondamentale tomantenere maintainuna adistanza minimumminima distance ofdi 80 cm betweentra theil centercentro of thedel controller ande theil centercentro ofdell'asse theposteriore rearquando axlelo whensi installinginstalla itsul on the roof.tetto.

---
MountMontare thela plasticflangia platedi onfissaggio thesul roof
tetto
  1. Take a

    Prendete ladderuna andscala positione itposizionatela nextaccanto toal thetrattore tractorin somodo youda canpoter easilyaccedere accessfacilmente theal roof.tetto.

  2. Spray the

    Spruzzate degreaserlo onsgrassatore thesul rooftetto in the nell'area surroundingcircostante theil marksegno ande wipestrofinate itfinché untilla thesuperficie surfacenon isè dry.asciutta.

  3. Check with

    Verificate acon leveluna whetherlivella these positionla youposizione haveche marketavete onscelto thesul rooftetto isè ideallyidealmente flat.piana.

  4. Cut

    Tagliate pezzi di nastro adesivo lunghi 6-8 centimeterscentimetri, longscoprite piecesun oflato tape,del uncovernastro onee sideattaccatelo ofal thetetto tapein andmodo stickche itla toforma thedel roofnastro soadesivo thatsia therettangolare.

    shape of the sticked tape is rectangular.
  5. If the

    Se roofil hastetto anypresenta upliftsdei rialzi al centro o qualsiasi altra anomalia nella sua planarità, utilizzare il nastro biadesivo per livellare lo spazio.

  6. Incollare il nastro biadesivo nei punti in thecui centreè orpresente anyun'anomalia otherdi anomalyplanarità.

  7. Ripetere il passaggio precedente tutte le volte che è necessario, verificando ogni volta con la livella se la posizione è perfettamente piana.

  8. Prendere la lastra di plastica e girarla in itsmodo flatness,che useil thelato double-sidecon tapeil tonastro levelsia therivolto spaceverso up.il basso. Provare la lastra di plastica sul tetto,

  9. Stick the

    assicurandosi double-sideche tapel'elemento inche thespicca placesdalla whereforma therecircolare issia anyrivolto anomalyidealmente inverso flatness.il retro del trattore.

  10. Repeat the

     abovePremere stepsaldamente asla manypiastra timesdi asplastica necessary,sul eachtetto.

    time checking with the level whether the position is ideally flat.
  11. Take the

    Premere Plasticleggermente Platela andflangia turnper itassicurarsi aroundche soaderisca thatsaldamente theal sidetetto.

    with

     the

    tape faces the bottom.
  12. Try the Plastic Plate on the roof, ensuring that the element standing out from the circular shape ideally faces the back of the tractor.
  13. Firmly press the Plastic Plate to the roof.
  14. Lightly hit the Plastic Plate with your feast on the edges to ensure that it sticks firmly to the roof.

PowerSteer_manual_25.10_eng95.webp


YouSui candispositivi horizontallymobili scrollè thepossibile tablescorrere onorizzontalmente mobile.la tabella.